MY FIRST SUBJECT AND FILE
In this section you’ll see how you can create your first subject and import your first file.
- Video chapters
0:00 Source data
2:23 Create a new subject
4:29 Create sessions and tasks
6:21 Import an EEG recording
18:35 Processes and run!
19:19 Output files
Create a new subject
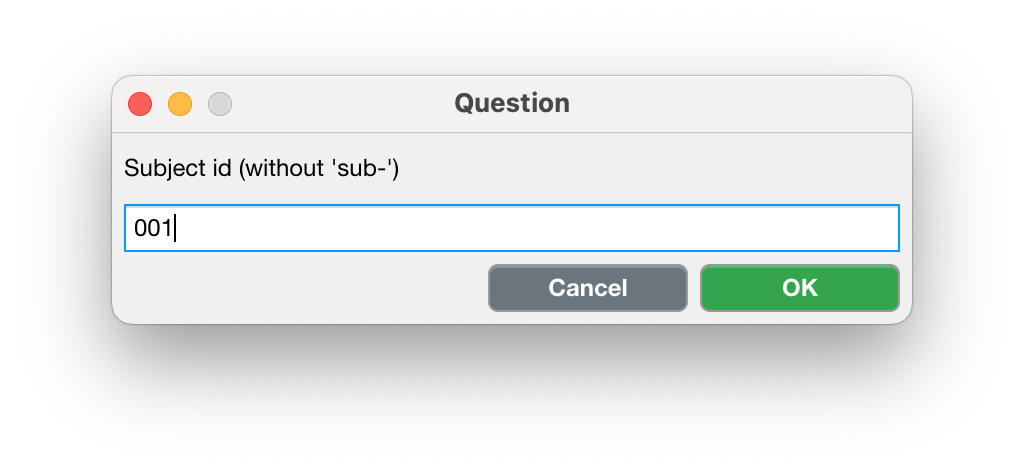
Use the “Add subject” button to open a new dialog where you can specify the subject-ID. Do not add the
sub-prefix, just the subject-ID. Press “OK” to confirm, or “Cancel” to abort.
Edit an existing subject
Select a subject from the tree in the middle left panel.
Change the subject-ID
Use the “Save” button to commit the changes, or use the “Undo” button to revert back to the orignal subject-ID.
Permanently delete files of a subject
Select a subject from the tree in the middle left panel.
Use the “Delete” button to permanently delete all files of a single subject.
A new dialog window will appear to confirm your action. Use the “Yes, delete” button to delete all files associated with this subject stored in the
rawdataandderivativesfolders, or use the “No, cancel” button to abort.

Note
Only files in the ‘rawdata’ and ‘derivatives’ folders that are associated with the selected subject are permanently deleted. The EEG Processor will never touch any file in the ‘sourcedata’ folder.
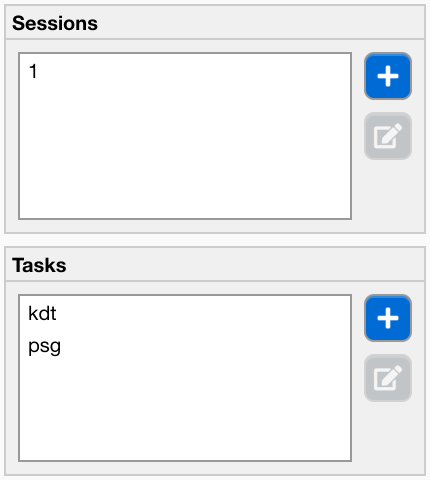
Specify sessions and tasks
Before you import a new file, you must first make sure to specify the name of the session and the task. You can do this on the “Dataset” tab in the middle right panel: see the “Sessions” and “Tasks” panels. Sessions are often simply “1”, “2”, etc., or “baseline” and “followup” (or “bl” and “fu” for short). Tasks need to descriptive, and can also be “restingstate”, or “psg”. Please refer to the BIDS Specification Common Principles for more information.
Use the “Add session” and “Add tasks” buttons to create new tasks.
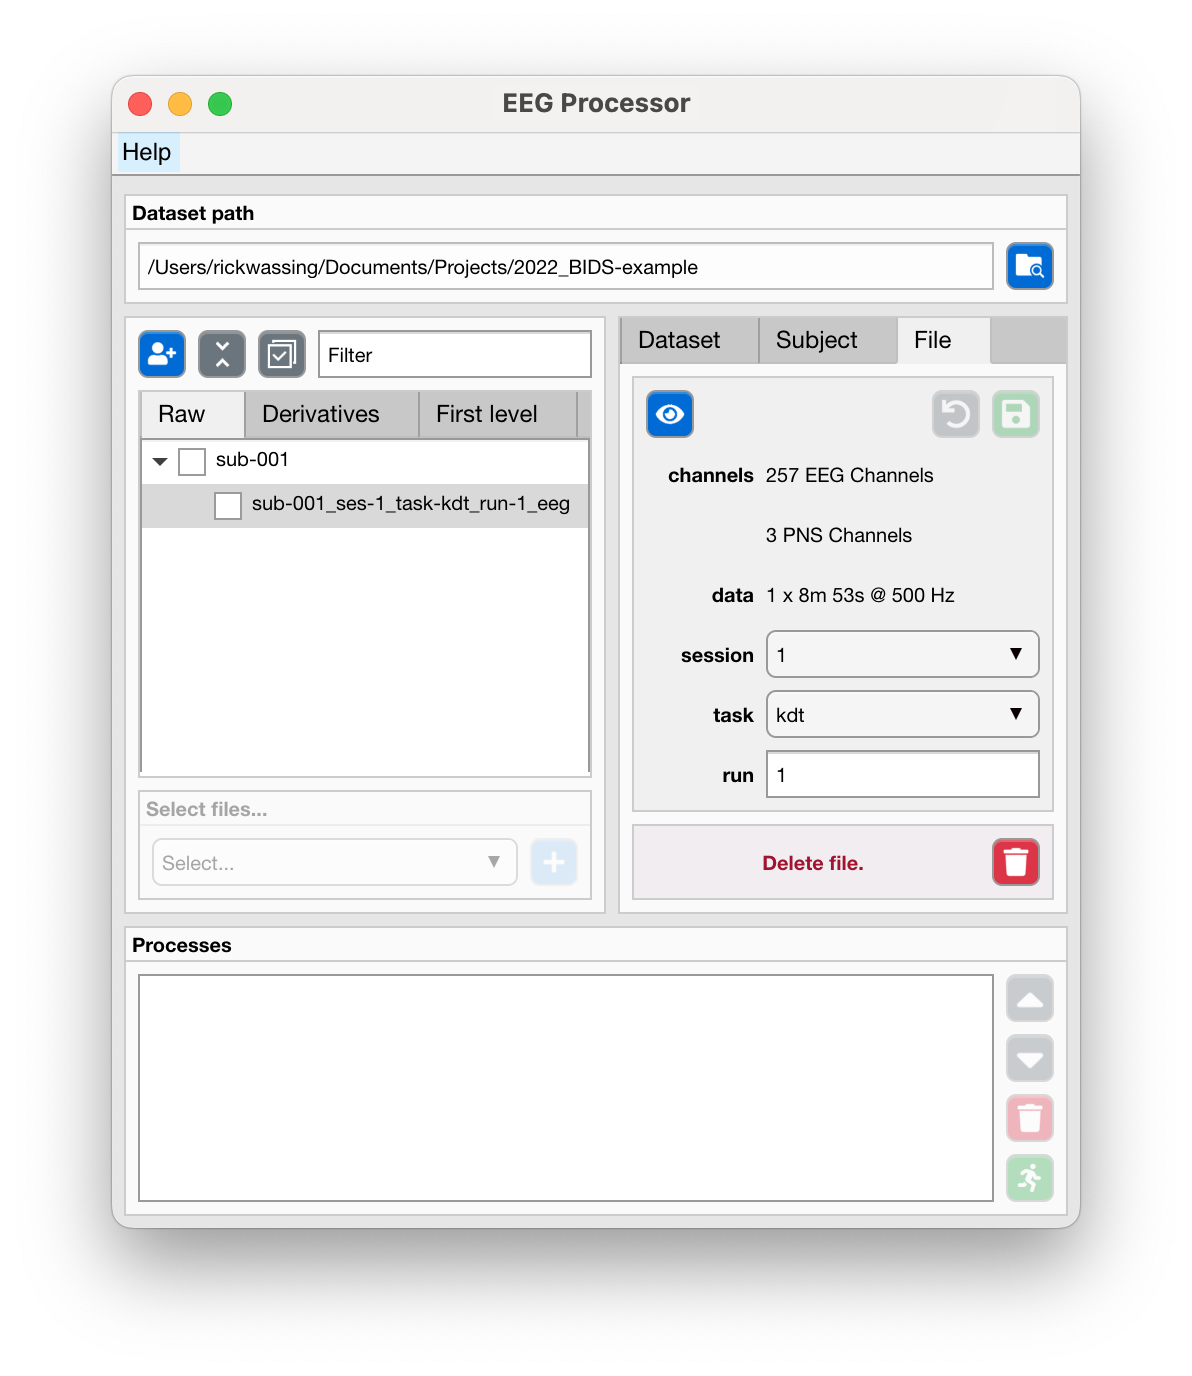
Import a new file
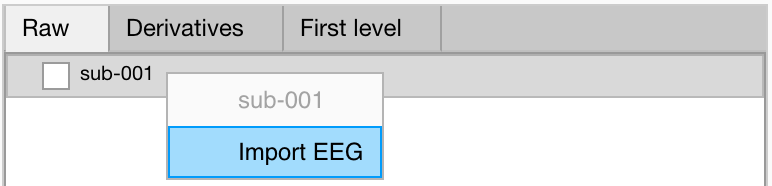
In the center left files panel, select the
Rawtab.Right click on any subject node to open the menu.
Select “Import EEG”
A new dialog window opens where the following import settings need to be specified:
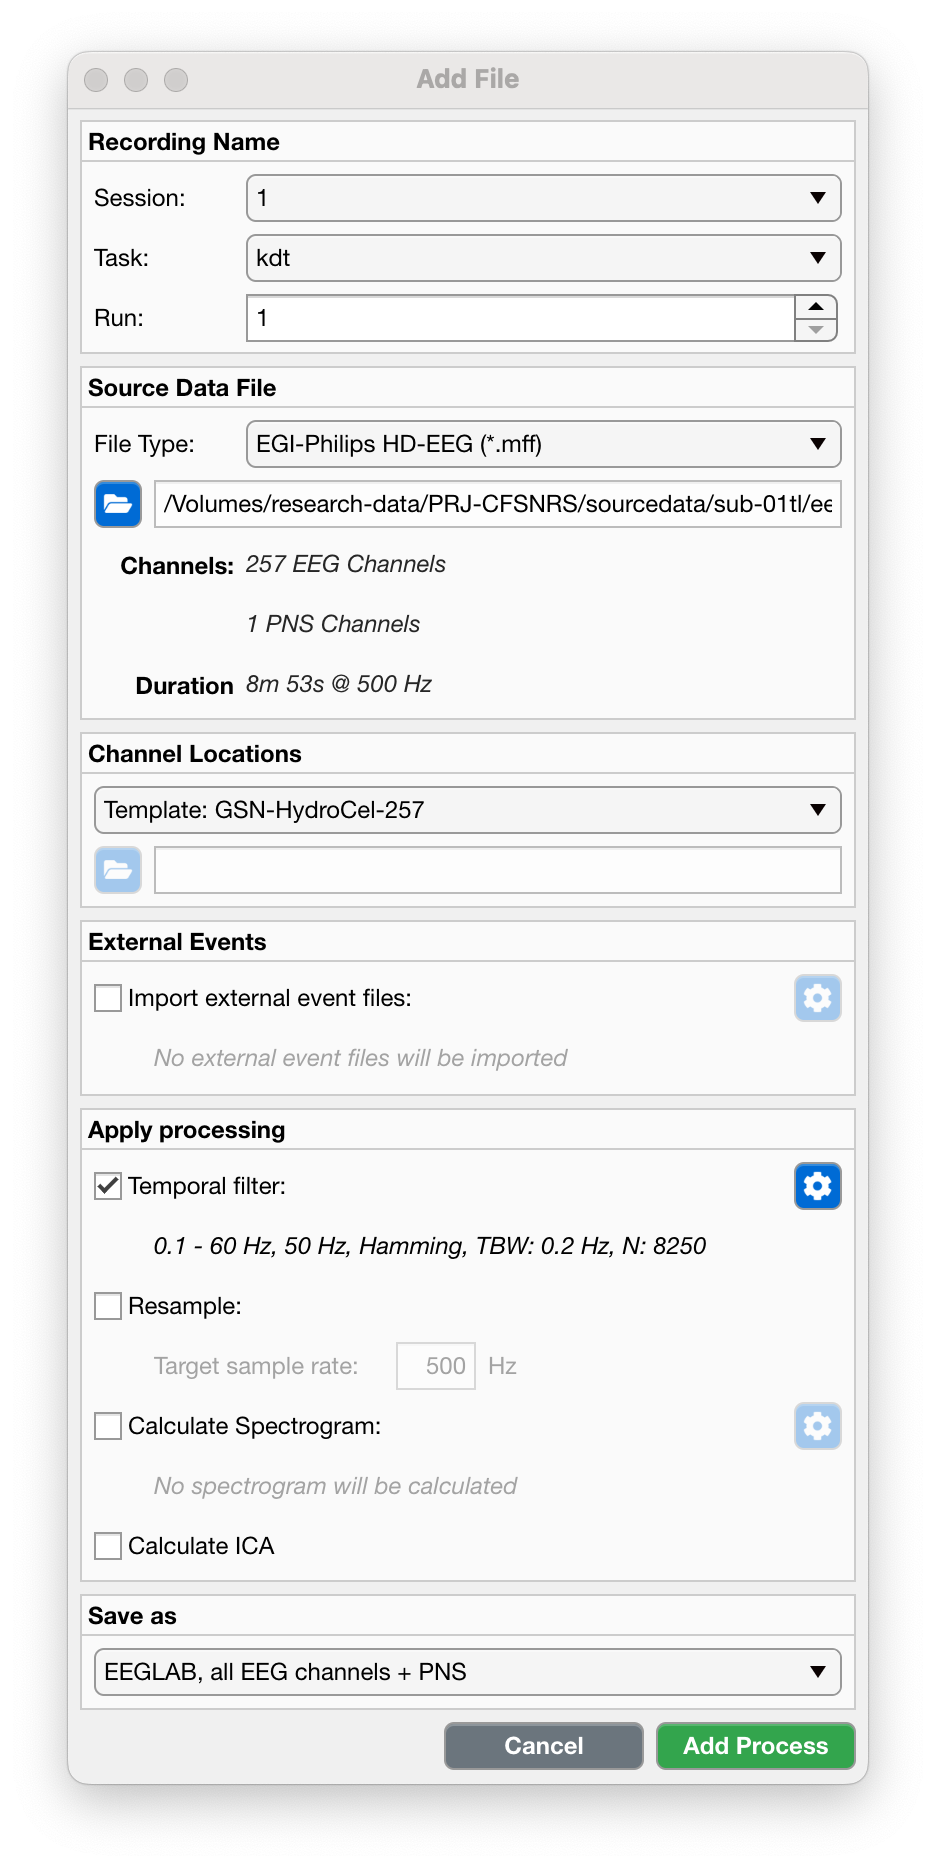
- Recording Name
Session
Use the dropdown menu to select the session this recording belongs to.
Task
Use the dropdown menu to select the task performed during this recording.
Run
Enter the run number.
- Source Data File
File Type
Use the dropdown menu to select
Path
Use the “Browse” button to select the
sourcefile to import.- Channel Locations
Channel File Type
There are either templates of the channel locations, or you can import a Geoscan file. Use the dropdown menu to select
Template: GSN-HydroCel-257 (for EGI-Philips HD-EEG)
Template: Compumedics-257 (for Compumedics HD-EEG)
Template: 10-20 (For 10-20 Converted by EEG Processor)
Import Geoscan
Channel Path
If you selected “Import Geoscan”, you must use the “Browse” button to select the Geoscan output file (.txt).
- External Events
Import external event files
In addition to the events already stored in the EEG
sourcefile, you can also import events from specific external files.Tick the checkbox to enable the import settings button.
Use the “Settings” button to open a new dialog.
- In the new dialog, use the “Browse” buttons to select the
Compumedics hypnogram file (.txt)
Compumedics scored-events file (.txt)
Wonambi events file (.xml)
- Apply Processing
Temporal filter
Tick the checkbox to apply a temporal filter (default on).
Use the “Settings” button to open a new dialog.
In the new dialog you can change the filter settings. Make sure that, within the frequency range of interest, the magnitude response and the phase response is zero.
Resample
Tick the checkbox to resample the data (default off). If disk-size or RAM (Memory) are not an issue, it would be recommended to keep the original sampling rate.
Calculate spectrogram
Tick the checkbox to calculate a spectrogram (default off). It may be useful to have the spectrogram while visually inspecting artefacts, or scoring sleep events.
- Use the “Settings” button to specify the parameters of the spectrogram.
First you must specify which channels to use in calculating the spectrogram, by clickin on any channel in the topoplot, or using the “All” button.
Specify other properties of the spectrogram algorithm.
Calculate ICA
Tick the checkbox to perform independent component analysis on the data (default off). Note that ICA assumes the EEG timeseries to be stationary, i.e. that the underlying sources that generate the timeseries do not change or that they change their statistical dependencies.
- Save as
- Use the dropdown menu to select how you want to save the file.
“EEGLAB, all EEG channels + PNS”: Save all EEG channels and physiology channels as a .SET/.FDT file.
“EDF, 12 EEG channels + EOG”: Select and re-reference 12 channels and a EOG channel and save it as an EDF file.
Warning
Although it may seem that the EEG Processor can import EDF files, it may not accurately handle any EDF file. The three specified formats (EGI, Compumedics, 10-20) have known data structures and the EEG Processor “knows” how to import them. Any other EDF may not have the expected data structure and may not import properly.
Ok, now you’ve specified all the import settings. What’s next?
Use the “Add Process” button to confirm the import settings, or use the “Cancel” button to abort.
You’ll notice that the file is not yet imported. Instead it is added to the processes queue. This way, you can specify more processes, e.g. import more files, and run them all sequentially.
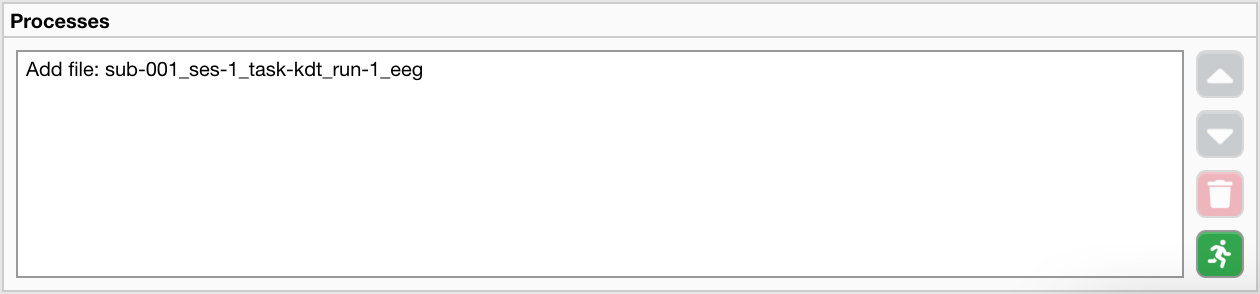
Use the “Run” button to start importing the file.
Once all processes have finished, the EEG Processor will now show you the imported files.